The Creature Console is the front end for the Creature Server! It is the main interface I use for controlling my creatures. The same app runs on macOS and iOS, and looks very similar on both platforms.
It speaks to the Creature Server over a RESTful API and a websocket. It is unaware of the database in use. It only talks to the Creature Server. It’s written in Swift using Swift UI. This is the first macOS application I’ve ever written and I’ve learned a ton along the way.
The Creature Console can create, edit and play animations, create and playback creature dialog sound tracks, manage playlists, and create “ad-hoc” animations on the fly to provide a bit of magic to folks watching.
For live use, it has a “streaming mode” where frames from a joystick are transmitted to the Creature Server in real time. I use that for playing around with things and for fun. 😍
I decided to write my app control app because I couldn’t find one that I liked that worked on macOS. (Getting iOS is also great!) There’s not a lot out there for animatronics on macOS, so I decided to go it alone. I’m glad I did, it’s been awesome having an app I wrote myself and can change as I wish.
Control Device
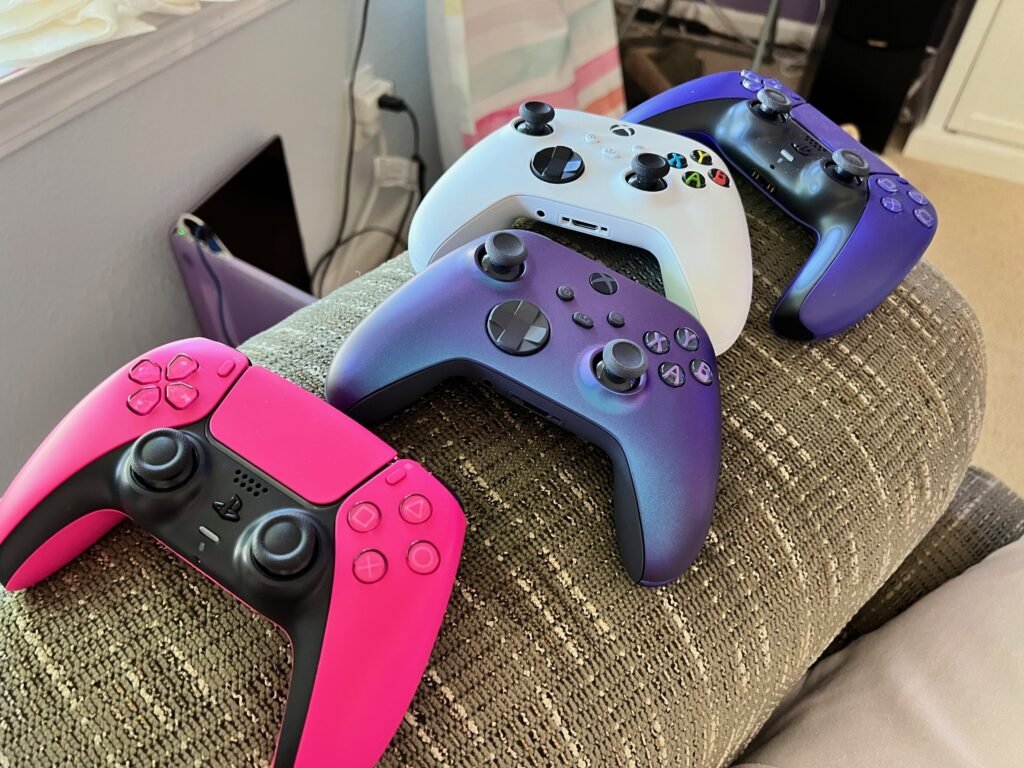
I use any joystick that works on macOS and iOS for programming and real time control. My favorite is the PS5 joysticks, because they have status lights, and I use that to my advantage. Blue means the app is idle, green means it’s streaming, yellow means it’s about to record, and red means it actually is recording.
Apple has really good support for joysticks in macOS and iOS, so I figured it would be good to leverage the work they’ve already done.
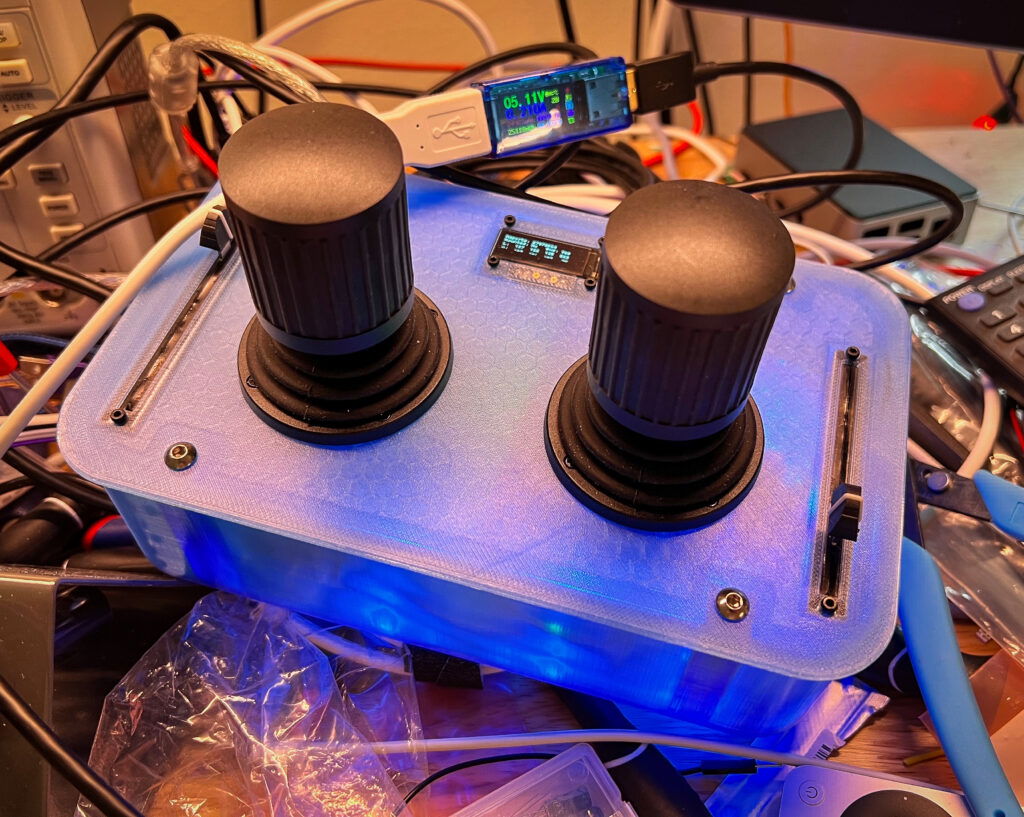
I also have a custom joystick, that has its own page! This is what I’ve been using more and more lately, since it was made just for my use case.
Managing Creatures
There’s not a lot to manage on a creature itself within the console. The actual details on how a creature functions are set via a JSON file that lives on the controller that it’s connected to.
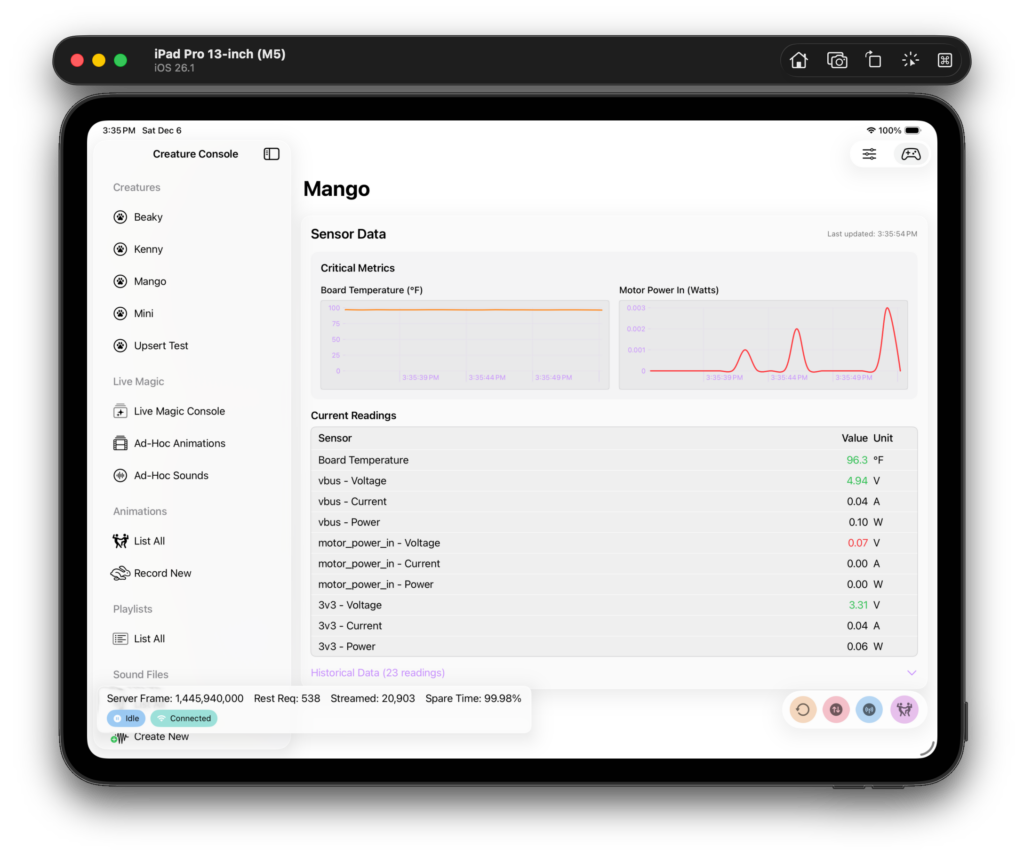
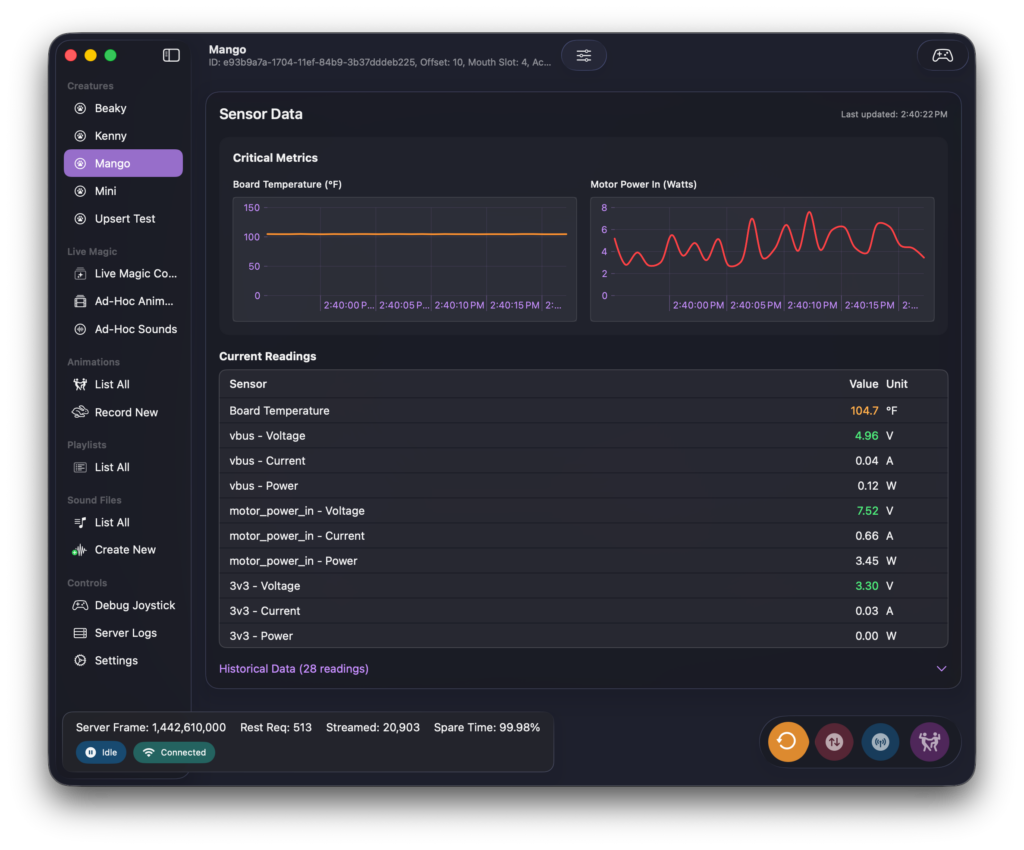
The primary function of the creature detail page is to allow real time monitoring. The data shown on this screen are coming off of the creature’s sensors on its controller.
The creature can be controlled in real time from this view. If the joystick icon in the upper right is selected, the position of the currently attached joystick will start streaming to the creature server over the WebSocket.
Animations
Animations are managed via the creature console’s animation views.
Playing and Managing Animations
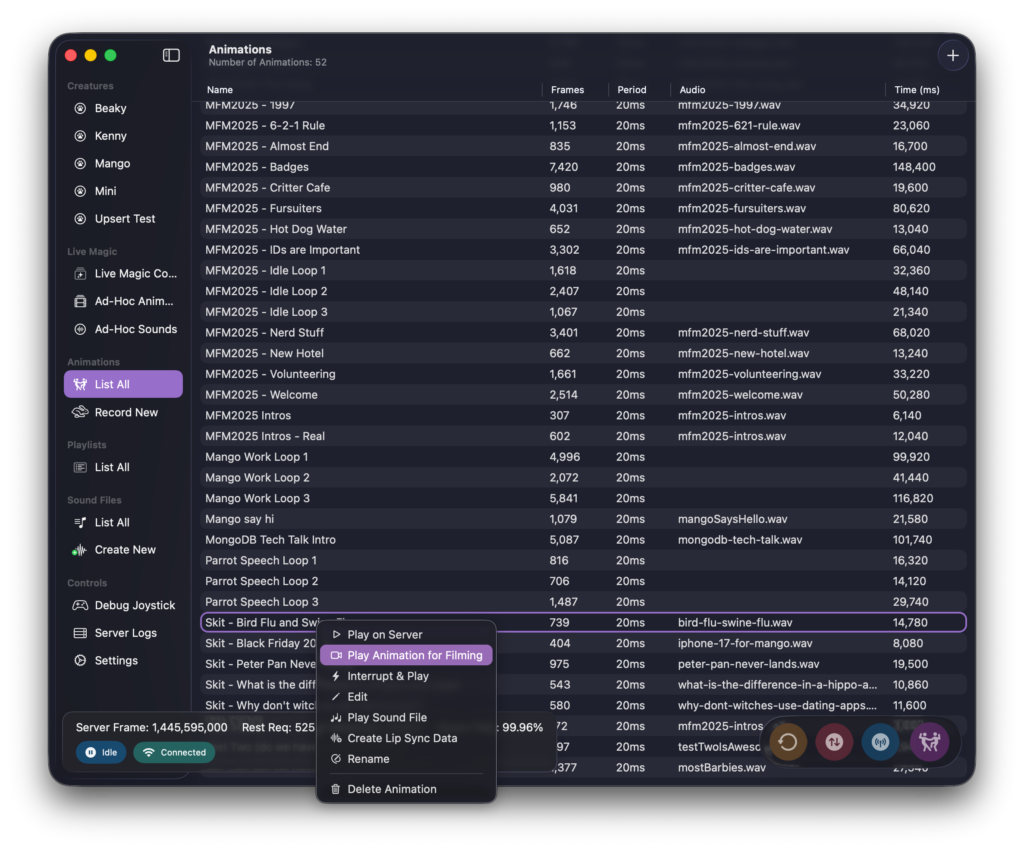
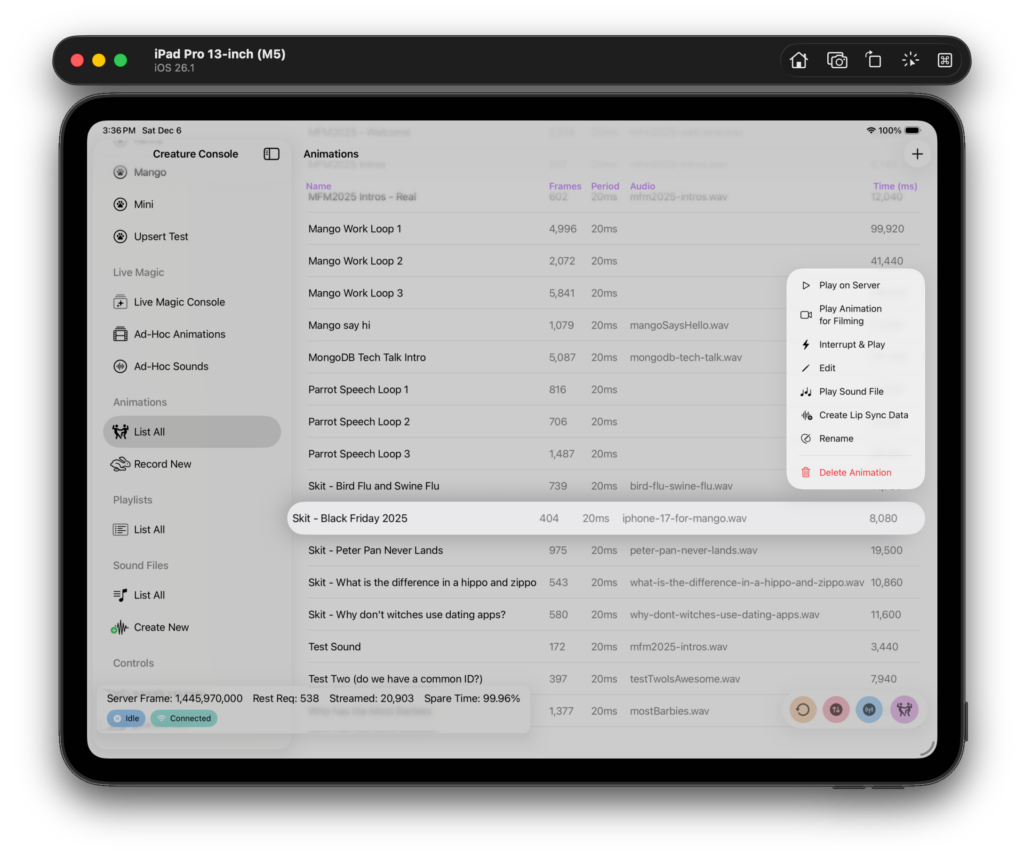
Animations appear in a list, and the commands to manage each one are in a context menu. The menus are identical on macOS and iOS.
The difference in “Play on Server” and “Play Animation for Filming” is that the filming version makes an audible clapping noise before playing the animation. This allow for aligning the videos in a video editor. (I use Final Cut Pro.)
Visualizing Animations
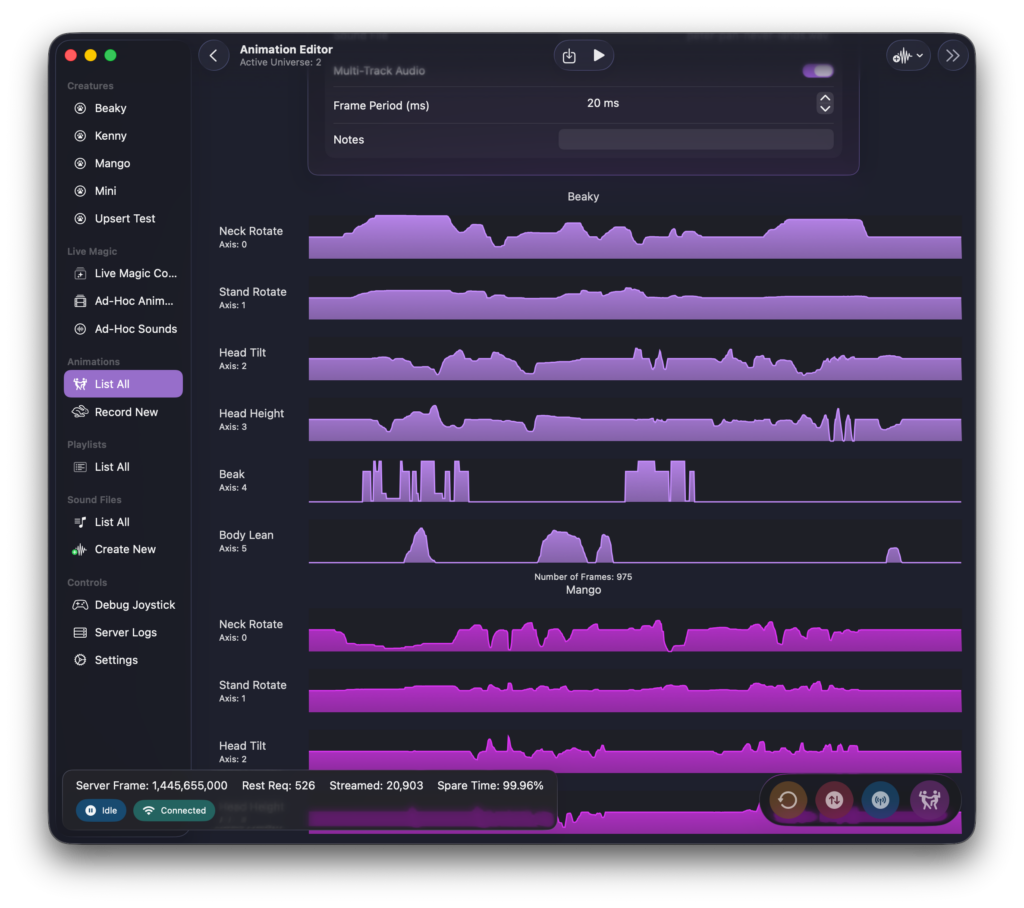
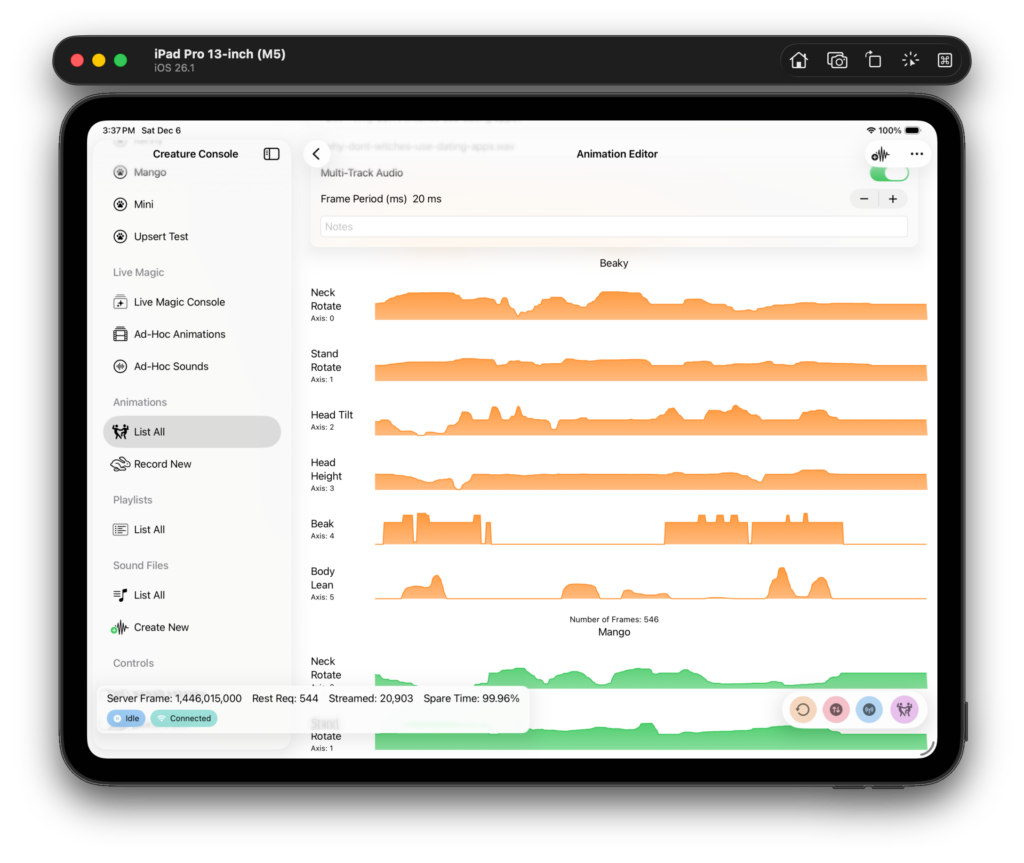
I took inspiration for how to visualize animations from audio editors.
One animation is a series of tracks. Each track is a set of channels that’s dedicated to one creature. The order of the tracks does not matter, but the order of the axises inside of a track does. (This is all handled for you based on the creature’s definition file.)
The X-axis on each track is time. The 0 position on the left is the start of the animation. The Y-axis is the position of the servo within its range of motion. Look at Axis 4 (Beak) for the above animation and you can get a feel for where in the animation the creature is speaking because its beak is moving.
While it looks analog, it really isn’t. You’re seeing each frame in the animation laid out linearly.
All animations are serialized to JSON and stored on MongoDB on the server, but the client has no idea this is happening.
Ad-Hoc Animations
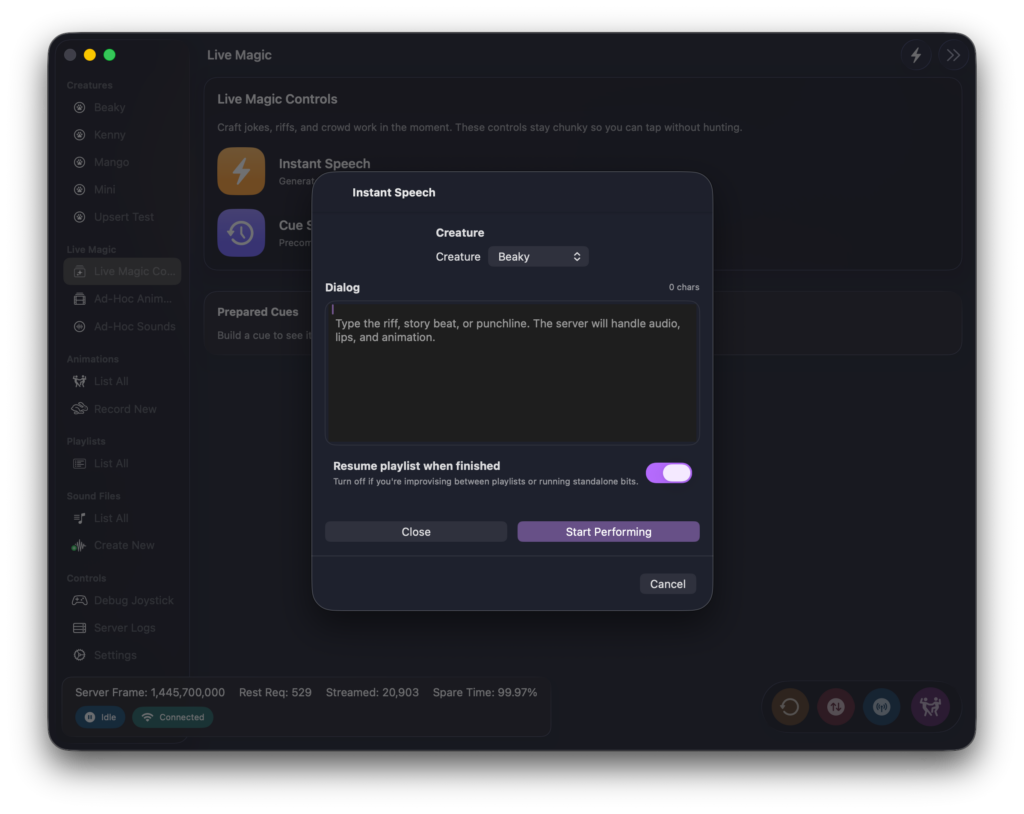
One of the things I’m the most proud of is the ability to create “ad-hoc” animations on the fly. These are created in the console by supplying some text that I’d like for the creature to say. Once this is done I am given the choice to make an animation and play it ASAP, or to cue it up. (Timing is the most important thing in comedy so usually I want exact control of when a creature speaks.)
This is a complex task that’s handled entirely on the server. The server will call out to the voice provider, download the sound file, then create the beak/lip movements, and finally combine it all together and save it in a collection in MongoDB just for this purpose. (I don’t use the main collection because I want the ad-hoc ones to TTL out after 24 hours. There’s rarely a need to play them more than once, and there is, I can just make them again.)
I felt like I had really gotten somewhere when I was able to type something on my phone or Mac and have a parrot say it back to me in just a few seconds. 💜
Mini Console
The mini console isn’t another console per se, it’s just a MenuBarExtra that’s included in the main server.
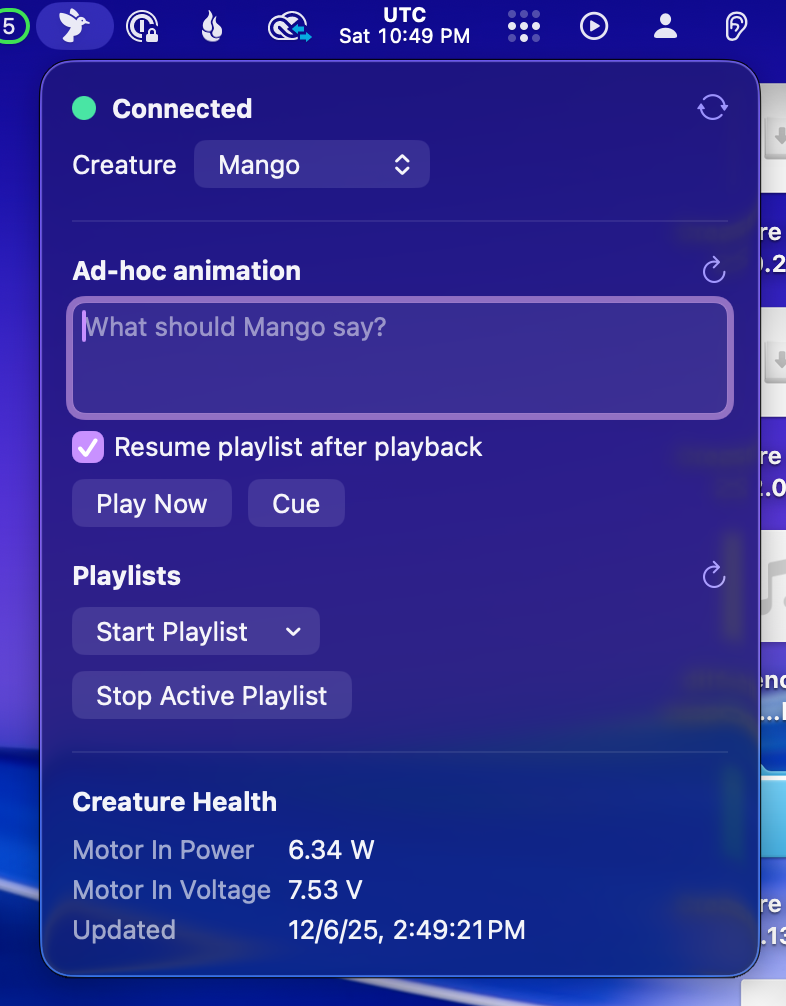
The mini console is where ad-hoc animations shine. It’s running on my work Mac all of the time, and I can discreetly create an animation for Mango to play while in meetings. (Mango is visible behind me in Zoom meetings.)
It doesn’t have a lot in it, but it has exactly what I need to accomplish a little bit of magic at work – having an animatronic parrot chime in at the right times on demand.
It’s also used for starting and stopping playlists. This is how I control which idle loop the creatures are playing at various times during the day.