This is my Creature Joystick!
Why build a joystick?
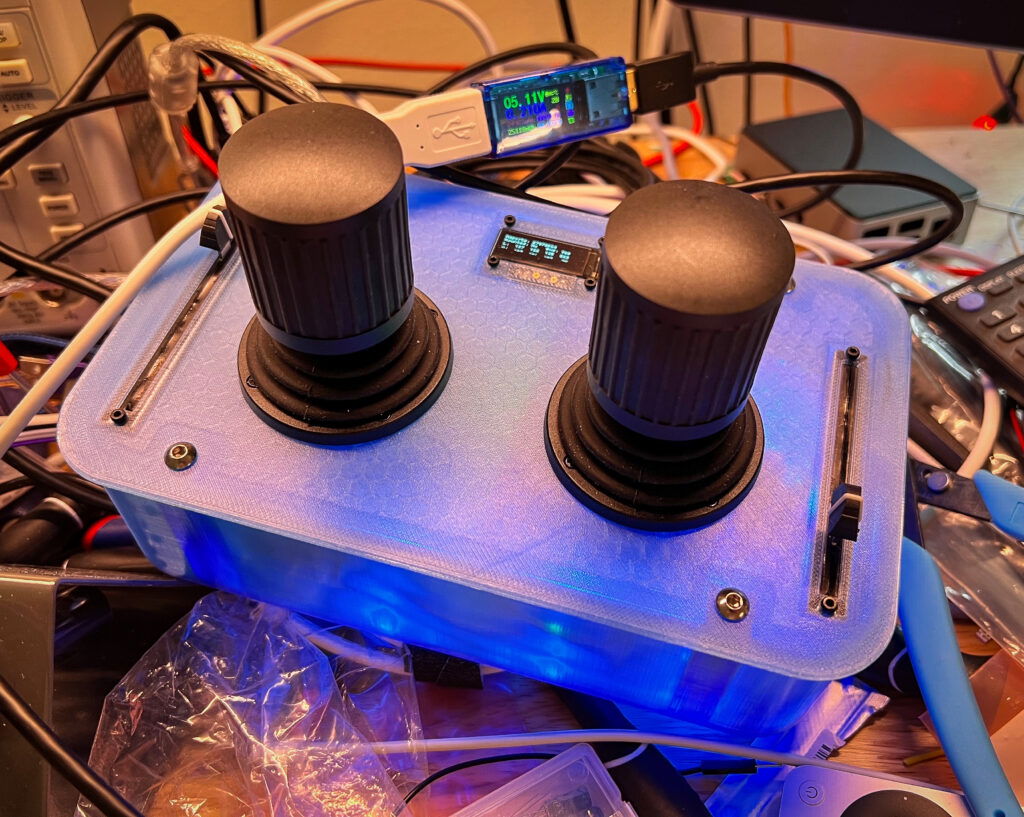
Using off-the-shelf PlayStation controllers has worked just fine, but for natural movements I wanted something more geared towards that use case. The sticks are three axises. (axii?) Traditional X and Y, but they also twist, making them three axises each. The sliders are used for slow, precise movements, like having a bird lean on a perch.
Since this joystick is eight axises I had to get a bit creative to make it work with macOS. I used the normal six axises that are on a joystick USB HID device for the sticks, and then used the wheel and slider inputs for the other two. This allows it to show up as a normal joystick to the operating system.
Code
The code for my joystick is on GitHub, like everything else. It’s based on the RP2040 microcontroller, and uses TinyUSB for the USB stack.
Thoughts on Joystick Controls
One of the benefits of controlling the firmware on the joystick myself is that I have full control of the “dead zone” in the middle. While having a joystick be centered (and not jitter) when in the resting position is critical for games, it’s not that helpful for controlling Creatures.
I decided to use a Responsive Analog Filter for the axises. I took Damien Clarke’s ResponsiveAnalogFilter library and ported it to C, rather than C++. I also cleaned it up for use on the RP2040. (Both Damien’s code and mine are MIT Licensed.)
The benefit to this approach is that when the joystick is holding still, no matter where it is, it requires a bit of movement to “wake up” and start to send updates to the host controller. Once the joystick stops moving it “falls asleep” and requires a fair amount of movement to start moving again. This works out great for an animatronic creature since you’ve got really precise movements while in motion, but it doesn’t jitter when held still. (No matter what position it’s in.)
Debugging
Learning how to make USB devices is an adventure! I’d never done it before.
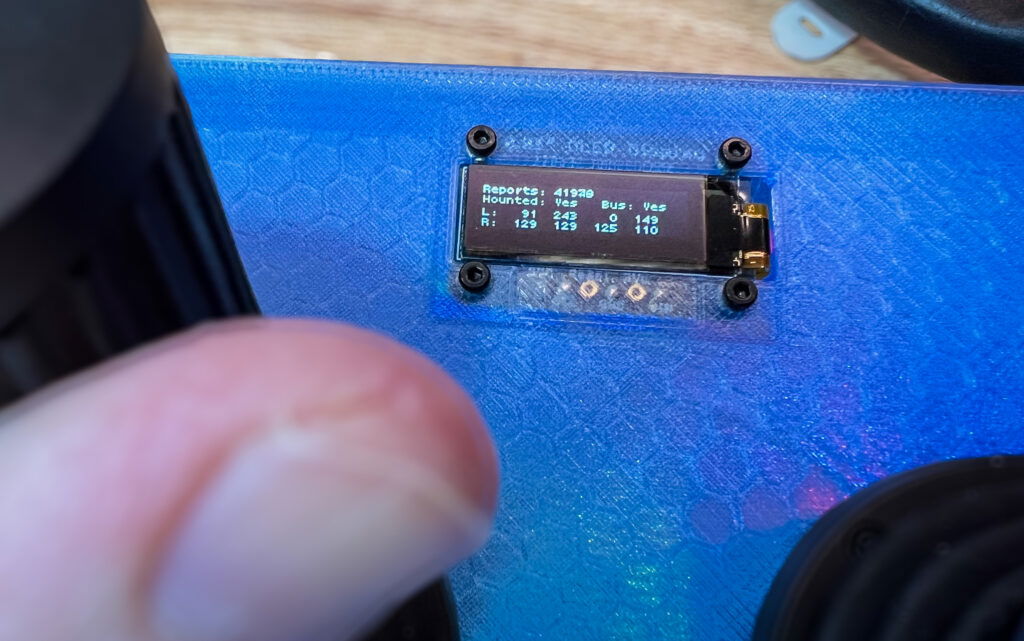
To make it easier on myself I incorporated an OLED display that shows me the number of HID reports that have been sent, if the device is currently mounted, and if the bus is present. It also shows the state of the axises at any time. This was really helpful when I was first starting out in this process.
Something else I learned along the way is to use Linux while working on a new USB device for the first time. The Linux kernel is very forgiving of buggy USB devices, and provides helpful error messages. macOS just freaks out when a buggy USB device is plugged in and cuts it off. 😅 (Which I would argue is the correct behavior for a consumer OS!)
I also use LEDs on the circuit board to indicate the direction of an axis, which is why the case is translucent. I can see the colors move around inside the case at a distance. Hopefully in a future revision I can get rid of the OLED display completely, since it’s an added cost.
Demo!
Here’s a short YouTube video showing it all in use.
Yes my workbench is messy. It always is. A clean workbench is an idle workbench! 😍